6 Pani Puri Flavours You MUST TRY! ❤️
If you’re a true pani puri lover like me, you’re going to fall in love with these flavours.Pani puri is truly one of the greatest flavour bombs we have to offer to the world!
While I’ll always cherish the classic teekha dhaniya-pudina paani but over the years, I’ve had so much fun experimenting and creating different flavours from unique ingredients.Some of you have even seen and tasted these creations before, and today, I’m beyond excited to share one of my most favourite videos ever with you!
Presenting my 6 pani puri flavours,Khata Meetha Aam, Anaar, Guava Chilli, Teekha Paani, Kokum, and Kiwi Pineapple 🤤And let me tell you, every single flavour turns out absolutely incredible.
I hope you try them at home and create your own little pani puri day! 🥰
And for that perfect, smooth texture and consistency, you can always trust our Blend Lab Pro 2.0. The best part? You can now get it within just 10 minutes on Zepto! 🙌
Full written recipe – Mangalorean Prawn Curry
Prep time: 10-15 minutes
Cooking time: 20-25 minutes
Serves: 5-6 people
Ingredients:
Fresh curry paste
COCONUT OIL | नारियल का तेल 1 TSP
BYADGI RED CHILLI | ब्यादगी लाल मिर्च 10 NOS.
CORIANDER SEEDS | साबुत धनिया 2 TSP
CUMIN SEEDS | जीरा 1 TSP
BLACK PEPPERCORNS | साबुत काली मिर्च 1/2 TSP
CAROM SEEDS | अजवाइन A PINCH (OPTIONAL)
FENUGREEK SEEDS | मेथी के बीज A PINCH
GARLIC | लहसुन 8-10 CLOVES
GINGER | अदरक 1 INCH
ONION | प्याज़ 1 NO.
TAMARIND | इमली 2 TBSP (LEMON SIZED BALL)
FRESH COCONUT | ताज़ा नारियल 1 CUP (SCRAPED)
TURMERIC POWDER | हल्दी पाउडर 1/2 TSP
WATER | पानी AS REQUIRED
Tempering & final cooking
COCONUT OIL | नारियल तेल 2 TBSP
MUSTARD SEEDS | राई 1/2 TSP
CURRY LEAVES | कड़ी पत्ता 10-12 NOS.
GREEN CHILLI | हरी मिर्च 1 NO. (SLIT)
ONION | प्याज़ 1 NO. (CHOPPED)
HOT WATER | गरम पानी AS REQUIRED
PRAWNS | झींगे 300 GRAMS (CLEANED & DEVIENED)
SALT | नमक A PINCH
LEMON JUICE | नींबू का रस 2 TSP
COCONUT MILK | नारियल का दूध 2-3 TBSP
Method:
Set a pan over high heat & let it get hot, then lower the flame & add the coconut oil, add the red chillies & roast the chillies over low flame while stirring continuously until they get hot & puff up slightly. Transfer the chillies into a bowl & set them aside.
In the same pan add all the whole spices of the paste, & roast them over medium flame until they turn fragrant & golden brown in colour. Transfer the spices into the same bowl as the chillies & let all the ingredients cool down completely.
Once cooled, transfer the mixture into a mixer grinding jar & add garlic, ginger, onion, tamarind, fresh coconut, turmeric powder, water & grind it into a smooth paste. Do not add a lot of water, keep the paste thick.
To make the curry, set a stock pot over high flame, add the coconut oil & let it get hot.
Add mustard seeds, let them crackle then add curry leaves, green chilli & onion, stir well & cook over medium high flame until the onions turn soft.
Next, add the prepare paste, stir well & cook over high flame for 4-5 minutes or until a slight glaze appears on the paste.
Add hot water to make a thin curry, stir well & bring it to a boil then let it simmer for 12-15 minutes over medium flame. The curry will cook nicely & thicken up, which will completely change the flavour profile of the gravy.
Meanwhile, as an optional step, you can add a pinch of salt & some lemon juice to the prawns, it will get rid of any off-smell present in the prawns.
After simmering the curry for 12-15 minutes, add the prawns, stir it gently & cook for 5-6 more minutes until the prawns get fully cooked.
Once the prawns get cooked, you can adjust the consistency of they curry as per your preference, cook it further for a few more minutes if you want the curry to be thick or add hot water if you like the curry to be thin.
Taste & adjust salt if required & optionally you can also add some coconut milk.
Your super delicious, quick & easy Mangalorean Prawn Curry is ready. Serve piping hot with neer dosa, cooked rice or boiled matta rice (red rice).
YFL Family!!! I am Super excited to present to you our brand new Cüraa Retro Electric Kettles! ✨ a beautiful addition to our Cüraa by YFL home family.
Electric kettles have been one of the most used appliances in my day to day life for the convenience it provides, be it in my kitchen, my office space or even in my room.
At Cüraa by YFL home we are building products which have the right balance of convenience, safety and design and while we were designing our own Cüraa electric kettle, it definitely had to be special 🌟
While a kettle’s job is to boil water, our Kettle comes with a 2000 watts heating element which helps boil water quickly, making it more convenient to use multiple times in a day, it is made with food-grade stainless steel for a rust-free, healthy boiling experience. With safety at the core, it comes with Strix Control (made in the UK) that ensures longevity and packs in various safety features and of course while our kettles had to be convenient and safe it also had to be the most beautiful and gorgeous Kettle! ❤️
Our kettles are available in two stunning pastel colours! They come with a 2-year warranty and you can order one right now from YFLhome.com!
Ingredients:
CASHEW | काजू 20-25 NOS. (FOR SOAKING)
CASHEW | काजू 30-35 NOS. (FOR FRYING)
HOT WATER | गरम पानी AS REQUIRED (FOR SOAKING)
GHEE | घी 2 TBSP
PANEER | पनीर 350 GRAMS (CUBES)
TOMATO | टमाटर 1 NO. (ROUGHLY CHOPPED)
WATER | पानी AS REQUIRED
REMAINING GHEE | बचा हुआ घी
OIL | तेल 1-2 TBSP
WHOLE SPICES
CUMIN SEEDS | जीरा 1 TSP
BAY LEAF | तेज पत्ता 1 NO.
GREEN CARDAMOM | हरी इलायची 2-3 NOS.
CINNAMON | दालचीनी 2 INCH
ONION | प्याज़ 4 MEDIUM SIZE (CHOPPED)
GINGER GARLIC GREEN CHILLI PASTE | अदरक लहसुन हरी मिर्च की पेस्ट 2 TBSP
POWDERED SPICES
TURMERIC POWDER | हल्दी पाउडर 1/4 TSP
KASHMIRI RED CHILLI POWDER | कश्मीरी लाल मिर्च पाउडर 1 TBSP
SPICY RED CHILLI POWDER | तीखी लाल मिर्च पाउडर 2 TSP
CORIANDER POWDER | धनिया पाउडर 2 TBSP
CUMIN POWDER | जीरा पाउडर 1 TSP
HOT WATER | गरम पानी A SPLASH
CORIANDER STEM| धनिए कि डंठल 1 TBSP
CURD | दही 1/2 CUP
SALT | नमक TO TASTE
GREEN CHILLI | हरी मिर्च 2 NOS. (SLIT)
GINGER JULIENNE | अदरक के लच्छे A HANDFUL
GARAM MASALA | गरम मसाला A PINCH
ROASTED KASURI METHI POWDER | भुनी कसूरी मेथी का पाउडर A PINCH
Method:
Add 20-25 cashews in a bowl, add hot water, cover & let them soak until you do some further processes.
Set a pan over high heat, add ghee & let it get hot.
Add the remaining cashews, keep stirring & fry them over medium heat until the turn light golden, then transfer them into a bowl.
In the same pan add the paneer cubes & shallow fry them until golden brown from 2 sides, then transfer into a bowl & set it aside, we will be using the remaining ghee to cook the gravy further.
Once the cashews have soaked, discard the water & add them into a mixer jar, add tomato with some water & grind it into a fine puree.
To make the gravy set a kadhai over high heat, add the remaining ghee & let it get hot.
Add all the whole spices along with onions, stir well & cook until the onions turn light golden brown over medium high flame.
Then add the ginger garlic green chilli paste & cook it further for 2 minutes until the mixture turns golden brown.
Lower the flame & add all the powdered spices with a splash of hot water, stir well & then cook over high flame for 2-3 minutes until the ghee gets separated, then add the coriander stems & stir well.
Next, add the prepared tomato puree along with whisked curd & salt, stir well & then continue to cook over medium high flame until the gravy becomes crumbly & the ghee gets separated, do not add any hot water while cooking at this stage.
Once the gravy becomes crumbly & the ghee has separated, add hot water to adjust the consistency of the gravy & cook the gravy for 2-3 minutes.
Add the fried paneer & cashews (I like to reserve some fried cashews & add them as garnish later), green chilli, ginger, garam masala, roasted kasuri methi powder & stir well, cook for 3-4 minutes.
Lastly taste & adjust salt if required & add fresh coriander.
Your delicious Paneer Kaju Masala is ready, serve it with some tandoori roti or naan.
It’s been nearly a decade since I started creating and sharing with the world, yet every single time we work on something new, I still feel those butterflies in my stomach. Whether it’s a new recipe, a video, or a product, the thrill of building something from scratch never fades.
There’s something magical about starting with an idea, pouring your heart into it, and then waiting the night before you finally share it with the world. And while many might think the job is done once you hit that “upload” button, that’s actually when the real work begins. The process, the never-ending cycle of creating, sharing, and building, is what keeps me going.
This next project has been a labor of love, and the time has almost come to bring it to life. I’m beyond excited for you all to see it. Let’s meet tomorrow with CÜRAA ❤️
The Music I use in All my videos – https://bit.ly/3CdPbSc
(Best for independent creators)
Follow us on all platforms:
Facebook – https://bit.ly/3o6alLt
Instagram – https://bit.ly/2RFkL8z
Follow my personal handles here: (Chef Sanjyot Keer)
Facebook – https://bit.ly/3tpjqQA
Instagram – https://bit.ly/3o0FZK8
Twitter – https://bit.ly/33qQpJN
Ingredients:
Pepper Fry Masala
BLACK PEPPERCORNS | साबुत काली मिर्च 2 TBSP
FENNEL SEEDS | सौंफ 1 TSP
CUMIN SEEDS | जीरा 1 TSP
Cooking
OIL | तेल 3-4 TBSP
CUMIN SEEDS | जीरा ½ TSP
FENNEL SEEDS | सौंफ ½ TSP
GARLIC | लहसुन 8-10 CLOVES
CURRY LEAVES | कड़ी पत्ता 8-10 NOS.
ONION | प्याज़ 4 MEDIUM SIZE (SLICED)
MUTTON | मटन 1 KG
GINGER GARLIC GREEN CHILLI PASTE | अदरक लहसुन मिर्च कि पेस्ट 2 TBSP
TURMERIC POWDER | हल्दी पाउडर ¼ TSP
GARAM MASALA | गरम मसाला ¼ TSP
SALT | नमक TO TASTE
HOT WATER | गरम पानी 150-200 ML
PEPPER FRY MASALA | पेपर फ्राई मसाला
CURRY LEAVES | कड़ी पत्ता A LARGE HANDFUL
GREEN CHILLI | हरी मिर्च 2-3 NOS. (SLIT)
GHEE | घी 1 TBSP
FRESH CORIANDER | हरा धनिया A HANDFUL (CHOPPED)
LEMON JUICE | नींबू का रस OF HALF A LEMON
Method:
Set a small pan over high heat & once it gets hot, lower the flame & add fennel seeds, cumin seeds & black peppercorns, keep stirring & dry roast them over low flame until the cumin seeds turn light brown, then transfer them into a bowl, cool them down completely & grind into a fine powder.
Set a pressure cooker high flame & add the oil, let it get hot.
Add cumin & fennel seeds, garlic, curry leaves, stir well & cook for a few seconds.
Further add the sliced onions & cook them over medium high flame until they turn light golden brown.
Once the onions turn golden brown, add the mutton along with ginger garlic chilli paste, turmeric powder, garam masala & salt, stir well & cook for 3-4 minutes over high flame.
Add water & then pressure cooker over high flame until the first whistle, then lower then flame cook for 4-5 more whistles, you have to cook until the mutton is 85-90% cooked, cooking time will depend on the quality of the mutton.
Once cooked, switch off the flame & let the cooker depressurize naturally.
Open the lid, stir well & switch on the flame on high & pepper fry masala, curry leaves & green chillies, stir well & cook until all the moisture gets evaporated & the masala sticks to the mutton, it will also get fully cooked in the process.
Then taste & adjust salt if required, & lastly just heat some ghee in a small pan & add it into the mutton & add fresh coriander & stir well.
Your delicious mutton pepper fry is ready, serve it with some parotta.
#YFL #SanjyotKeer #muttonpepperfry
The Music I use in All my videos – https://bit.ly/3CdPbSc
(Best for independent creators)
Follow us on all platforms:
Facebook – https://bit.ly/3o6alLt
Instagram – https://bit.ly/2RFkL8z
Follow my personal handles here: (Chef Sanjyot Keer)
Facebook – https://bit.ly/3tpjqQA
Instagram – https://bit.ly/3o0FZK8
Twitter – https://bit.ly/33qQpJN
Intro 0:00
Pepper Fry Masala 1:22
Cooking Process 3:12
Plating 6:35
Outro 7:38
Written Recipe – Pressure Cooker Chicken Curry
Prep time: 5-10 minutes
Cooking time: 20-25 minutes
Serves: 4-5 people
Ingredients:
Quick Marination
CHICKEN | चिकन 750 GRAMS – 1 KG
SALT | नमक TO TASTE
TURMERIC POWDER | हल्दी पाउडर 1/4 TSP
KASHMIRI RED CHILLI POWDER | कश्मीरी लाल मिर्च पाउडर 1/4 TSP
DAHI | दही 2 TBSP
Base Gravy
OIL | तेल 1-2 TBSP
CUMIN SEEDS | जीरा A LARGE PINCH
ONION | प्याज़ 3 LARGE (SLICED)
TOMATO | टमाटर 2 NOS. (ROUGHLY CHOPPED)
CORIANDER STEM | धनिए कि डंठल A HANDFUL
GREEN CHILLI | हरी मिर्च 2 NOS.
GINGER | अदरक 4 INCH
GARLIC | लहसुन A HANDFUL / 20 CLOVES
SALT | नमक TO TASTE
HOT WATER | गरम पानी A SPLASH
WATER | पानी AS REQUIRED (for grinding)
Final Cooking
GHEE | घी 2 TBSP
OIL | तेल 1 TSP
WHOLE SPICES
CUMIN SEEDS | जीरा 1/2 TSP
CINNAMON | दालचीनी 2 INCH
BAY LEAF | तेज पत्ता 2 NOS.
GREEN CARDAMOM | हरी इलायची 3 NOS.
BLACK CARDAMOM | बड़ी इलायची 1 NO.
POWDERED SPICES
KASHMIRI RED CHILLI POWDER| कश्मीरी लाल मिर्च पाउडर 1.5 TBSP
TURMERIC POWDER | हल्दी पाउडर 1/2 TSP
CORIANDER POWDER | धनिया पाउडर 2 TBSP
SPICY RED CHILLI POWDER | तीखी लाल मिर्च पाउडर 1 TSP
HOT WATER | गरम पानी AS REQUIRED
GARAM MASALA | गरम पानी A PINCH
ROASTED KASURI METHI POWDER | भुनी कसूरी मेथी पाउडर A PINCH
FRESH CORIANDER | हरा धनिया A HANDFUL (CHOPPED)
Method:
Add the chicken into a large bowl & add salt, turmeric, kashmiri red chilli powder & curd, mix well & let the chicken marinate until you make the gravy.
Set a pressure cooker over high flame, add oil & let it get hot.
Add cumin seeds & onions, stir & cook over medium high flame until the onions turn golden brown.
Next, add the tomatoes, coriander stem, green chilli, ginger, garlic & salt, stir well cook until the tomatoes turn mushy then add some hot water & scrape the bottom to mix the fond (brown bits left in the pan after cooking, it’s full of flavor), then switch off the flame & let the mixture cool down completely.
Add the cooled mixture into a mixer grinder jar along with some water & blend it into a fine puree, the base gravy is ready.
In the same pressure cooker add ghee & oil, let it heat up over high flame.
Add all the whole spices, prepared puree, all the powdered spices & stir well, then add hot water & stir, make sure the gravy is slightly thin at this stage.
Put the lid on & pressure cook the gravy for 3 whistles over medium high flame, then switch off the flame & let the cooker depressurize naturally.
Open the lid & stir well, doing this quick process will shorten the cooking time of the gravy & will help to separate the ghee faster.
Switch the flame to high & add the marinated chicken, stir well & cook for 1-2 minutes, then add hot water (the level of water should be slightly below the chicken).
Pressure cook the chicken over high flame until the first whistle blows, then lower the flame to medium & cook for 3 more whistles (the cooking time will depend on the quality of your chicken).
Once cooked, switch off the flame & let the cooker depressurize naturally, then open the lid & stir well.
You can adjust the consistency of the gravy as per your preference by adding hot water.
Lastly taste & adjust salt if required & add garam masala, roasted kasuri methi powder & fresh coriander, stir well.
Your delicious, quick & super easy pressure cooker chicken curry is ready.
#YFL #SanjyotKeer #chickencurry
Buy now:
BlendLab Pro 2.0 – https://links.yflhome.com/blp2.0ytd
Amazon – https://links.yflhome.com/blendlabpro2amazon
The Music I use in All my videos – https://bit.ly/3CdPbSc
(Best for independent creators)
Follow us on all platforms:
Facebook – https://bit.ly/3o6alLt
Instagram – https://bit.ly/2RFkL8z
Follow my personal handles here: (Chef Sanjyot Keer)
Facebook – https://bit.ly/3tpjqQA
Instagram – https://bit.ly/3o0FZK8
Twitter – https://bit.ly/33qQpJN
Intro 0:00
Marination 1:29
Base Gravy 1:51
Final Cooking 5:08
Plating 8:31
Outro 10:44
Prep time: 5-10 mins
Cooking time: 15-20 mins
Serves: 3-4 people
Ingredients:
Dough:
WHEAT FLOUR | गेहूं का आटा 2 CUPS
CAROM SEEDS | अजवाइन 1/2 TSP (CRUSHED)
KALONJI | कलौंजी A LARGE PINCH
SALT | नमक TO TASTE
WATER | पानी AS REQUIRED (ADDED GRADUALLY)
OIL | तेल 1 TSP
Filling:
CHANA SATTU | चना सत्तू 1 CUP
GARLIC | लेहसुन 1 TBSP (CHOPPED)
GREEN CHILLI | हरी मिर्च 2-3 NOS. (CHOPPED)
GINGER | अदरक 1 TBSP (CHOPPED)
CAROM SEEDS | अजवाइन 1/2 TSP
KALONJI | कलौंजी 1/2 TSP
BLACK PEPPER POWDER | काली मिर्च पाउडर A LARGE PINCH
LEMON JUICE | नींबू का रस OF 1 LEMON
SALT | नमक TO TASTE
MANGO PICKLE MASALA | आम के अचार का मसाला 2 TBSP
MUSTARD OIL | सरसों का तेल 2 TSP
ONION | प्याज़ 1 SMALL SIZED. (CHOPPED)
FRESH CORIANDER | हरा धनिया A HANDFUL (CHOPPED)
Cooking Paratha
WHEAT FLOUR | गेहूं का आटा AS REQUIRED
GHEE | घी AS REQUIRED
Method:
Add the wheat flour, kolonji, carom seeds & salt in a bowl & mix well, then add water as required & mix well with your hands, once all the dry flour combines, knead it to form a semi soft dough, then add the oil & knead it again until the oil gets incorporated.
Once the dough is ready drizzle a few drops of oil to cover the surface of the dough & cover it with a damp cloth, let the dough rest for half an hour.
To make the filling, add the sattu in a bowl along with garlic, ginger, green chilli, carom seeds, kalonji, black pepper powder, lemon kuice, salt & mango pickle masala & mix well.
Then add the mustard oil & mix again, add the onion & fresh coriander, mix it well, the filling should bind well & stick together if squeezed between your palms.
Taste and adjust salt if required & your filling is ready.
To shape the paratha, take a portion of the dough & form it into a roundel then press it slightly, further form it into a bowl like shape by using your thumbs & rotating it.
Then fill it with a generous amount of the sattu filling & carefully bring the edges of the dough together to seal it, make sure to pinch out the excess dough.
Further coat the stuffed dough ball with dry wheat flour & then roll it out into a semi-thin paratha using a rolling pin, dust wheat flour as required.
To cook the paratha, heat the tawa really well then add the ghee & wipe it off using a clean napkin or a paper towel.
Then place the paratha on the tawa & cook it by pressing the paratha with a napkin while continuously rotating, cook the paratha from both the sides over high flame.
Further apply ghee on the paratha & cook it briefly until light golden brown over medium to low flame.
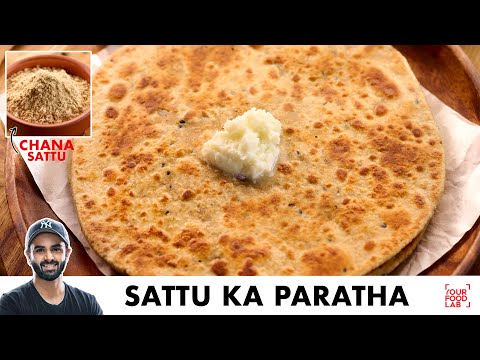
Your delicious and quick sattu ka paratha is ready, serve hot with dahi, chutney or chokha.
#YFL #SanjyotKeer #sattukaparatha
The Music I use in All my videos – https://bit.ly/3CdPbSc
(Best for independent creators)
Follow us on all platforms:
Facebook – https://bit.ly/3o6alLt
Instagram – https://bit.ly/2RFkL8z
Follow my personal handles here: (Chef Sanjyot Keer)
Facebook – https://bit.ly/3tpjqQA
Instagram – https://bit.ly/3o0FZK8
Twitter – https://bit.ly/33qQpJN
Ingredients:
Prep
POTATO | आलू 4 NOS.
TOMATO | टमाटर 2 NOS.
ONION | प्याज़ 1 MEDIUM SIZED.
Cooking
GROUNDNUT OIL | मूंगफली तेल 2-3 TBSP
MUSTARD SEEDS | राई 1/2 TSP
CUMIN SEEDS | जीरा A PINCH
ASAFOETIDA | हींग 1/4 TSP
GINGER GARLIC GREEN CHILLI PASTE | अदरक लहसुन और हरी मिर्च की पेस्ट 1 TBSP
SALT | नमक TO TASTE
POWDERED SPICES
TURMERIC POWDER | हल्दी पाउडर 1/4 TSP
SPICY RED CHILLI POWDER | तीखी लाल मिर्च पाउडर 1 TSP
CORIANDER POWDER | धनिया पाउडर 1 TSP
CUMIN POWDER | जीरा पाउडर 1/2 TSP
WATER | पानी AS REQUIRED
SUGAR | शक्कर A PINCH (OPTIONAL)
GARAM MASALA | गरम मसाला A PINCH
FRESH CORIANDER | हरा धानिया A HANDFUL (CHOPPED)
Method:
Peel & cut the potatoes into dices, cut the tomatoes similarly & then dice the onions as well.
Set a pressure cooker over high heat, add oil & let the oil heat up.
Add mustard seeds, cumin seeds, asafoetida & chopped onions, stir well & cook over high flame for 1-2 minutes or until the onion turns translucent.
Further add ginger garlic & green chilli paste, stir & add the tomato & cook for a minute.
Then add the diced potato along with salt, turmeric powder & all the remaining powdered spices, stir well & cook over high flame for 2-3 minutes.
Add water & a pinch of sugar, the water should at least be equal to the surface of the potatoes, put the lid on & pressure cook over high flame for 3 whistles then switch off the flame & let the cooker depressurize naturally.
Check the whistle & open the lid, stir well & switch on the flame & adjust the consistency at this stage if required.
Taste & adjust salt if required & add garam masala & fresh coriander, stir well & you quick & simple Gujarati style aloo tamatar pyaaz ki sabzi is ready.
#YFL #SanjyotKeer #alookisabji
The Music I use in All my videos – https://bit.ly/3CdPbSc
(Best for independent creators)
Follow us on all platforms:
Facebook – https://bit.ly/3o6alLt
Instagram – https://bit.ly/2RFkL8z
Follow my personal handles here: (Chef Sanjyot Keer)
Facebook – https://bit.ly/3tpjqQA
Instagram – https://bit.ly/3o0FZK8
Twitter – https://bit.ly/33qQpJN
Intro 0:00
Prep 1:15
Cooking Process 2:09
Plating 4:52
Outro 6:02
Prep time: 15-20 minutes
Preparation time of Kanji: 10-15 minutes (excluding 3-4 days of fermentation time)
Cooking time of Vade: 20-25 minutes (excluding soaking time)
Kanji
Ingredients:
WATER | पानी 2 LITRES
SPICE MIX
BLACK MUSTARD SEEDS | बारीक राई 2 TBSP
BLACK SALT | काला नमक 1/2 TBSP
ASAFOETIDA | हींग 1/4 TSP
BLACK PEPPERCORNS | साबुत काली मिर्च 1/4 TSPa
ROASTED CUMIN SEEDS | भुना हुआ जीरा 1 TSP
RED CHILLI POWDER | लाल मीर्च पाउडर 1/2 TSP
TURMERIC POWDER | हल्दी पाउडर 1/4 TSP
SALT | नमक 1/2 TBSP
CURD | दही 2 TBSP
LIVE CHARCOAL | जलता हुआ कोयला
ASAFOETIDA | हींग 1/4 TSP
MUSTARD OIL | राई का तेल
Method:
In a stock pot add the water, set it over high flame & let it come to a boil.
Meanwhile make the spice mix by adding all the spices into a spice grinder & grind it into a fine powder, you can also use a mortar pestle.
Once the water comes to a boil, switch off the flame & let it cool down until it gets lukewarm.
Add the spice mix into a clean large glass bowl & add curd, mix well to form a paste & then smear the paste onto the surface of the bowl.
To give the kanji a smoky flavour, place a bowl with live charcoal in it in the bowl, add some asafoetida on the coal & then some mustard oil, cover & let the spices smoke for 5 minutes.
Then remove the lid & add the lukewarm water, mix well & thoroughly incorporate the spices.
Cover the bowl using a muslin cloth & tie it, you can also use a mesh lid & place it in a warm place where it can get some sunlight & let it ferment for 3-4 days.
You need to open the lid & stir the kanji at least once every day.
Once fermented the kanji will give off a slight sour & tangy smell, small fragments of mustard seeds will also float on the surface, if you have followed the process carefully & used clean utensils the kanji won’t spoil, discard the kanji is you see a layer of fungus or if it smells foul & rancid.
Your delicious kanji is ready, you can store it in a glass container, it stays in the fridge for upto two weeks.
You can have the kanji as is or you can also have it with some vade.
Vade
Ingredients:
YELLOW MOONG DAL | पीली मूंग दाल 3/4 CUP
URAD DAL | उरद दाल 1/4 CUP
WATER | पानी AS REQUIRED
WATER | पानी AS REQUIRED
GREEN CHILLI | हरी मिर्च 2 NOS.
GINGER | अदरक 1 INCH
WATER | पानी 1 TSP
CORIANDER SEEDS | साबुत धनिया 1 TSP
FENNEL SEEDS | सौंफ 1/2 TSP
ASAFOETIDA | हींग 1/4 TSP
MUSTARD OIL | राई का तेल 2 TSP
SALT | नमक TO TASTE
FRESH CORIANDER | हरा धनिया A HANDFUL (CHOPPED)
LUKEWARM WATER | गरम पानी
SALT | नमक A PINCH
ASAFOETIDA | हींग 1/4 TSP
Method:
Wash the dals well & soak them for 3-5 hours.
Once soaked, drain the water & add the dals in a mixer grinder jar, add the ginger & green chilli & grind it into a paste, make sure that you use minimal water & the paste should not be extremely fine, transfer the paste into a large bowl.
Whisk the mixture really well for 2-3 minutes, the mixture should become fluffy & pale, you can either do it by moving your hand in a circular up & down motion or by using a whisk.
To check if the mixture is ready, scoop up some of it in a spatula or a spoon & flip it upside down, the mixture should not drop.
Once you have whisked the mixture add coarsely crushed coriander seeds & fennel seeds, asafoetida, then in a small ladle heat up the mustard oil & pour it on the spices, then add salt & fresh coriander & gently mix all the ingredients in the batter.
Before frying the vade, make the water that you will be needing to soak the vade after frying, in a large bowl, add lukewarm water, salt & asafoetida & mix it well.
Now to fry the vade, heat oil in a kadhai until its moderately hot or if you have a thermometer, the temperature of the oil should be 170 C.
Dip your hands in ice cold water & scoop out some batter then drop it carefully in the oil, drop a few more portions simalrly, make sure you don’t overcrowd the kadhai.
Fry over medium high heat until light golden brown, once they turn light golden brown remove them from the hot oil using a spider & then immediately transfer them into the water that you prepared for soaking the vade, let them soak for 15-20 minutes or until they sink.
Once soaked, remove the vade from the water & gently squeeze them in your hands to remove all the excess water & transfer them into a bowl.
Your vade are ready.
Transfer the vades into the kanji, chill it in the fridge before serving.
#YFL #SanjyotKeer #kanjivadarecipe
The Music I use in All my videos – https://bit.ly/3CdPbSc
(Best for independent creators)
Follow us on all platforms:
Facebook – https://bit.ly/3o6alLt
Instagram – https://bit.ly/2RFkL8z
Follow my personal handles here: (Chef Sanjyot Keer)
Facebook – https://bit.ly/3tpjqQA
Instagram – https://bit.ly/3o0FZK8
Twitter – https://bit.ly/33qQpJN
Intro 0:00
Kanji 1:09
Vada 10:16
Kanji Vada Assembly 15:29
Plating 15:52
Outro 16:36
Full written recipe of Paneer Tikka Biryani
Prep time: 25-30 minutes
Cooking time: 1hr 15 mins
Serves: 6-7 people
Ingredients:
Marinade
MUSTARD OIL 1 TBSP
KASHMIRI RED CHILLI POWDER 1 TBSP
CORIANDER POWDER 1 TSP
CUMIN POWDER ½ TSP
BLACK SALT ½ TSP
GREEN CARDAMOM POWDER A PINCH
ROASTED KASURI METHI POWDER ½ TSP
TURMERIC POWDER ¼ TSP
GARAM MASALA ½ TSP
GINGER GARLIC GREEN CHILLI PASTE 1 TBSP
HUNG CURD 4 TBSP
LEMON JUICE OF A LEMON
SALT TO TASTE
PANEER 500 GRAMS (CUBED)
ONION 1 NO. (PETALS)
CAPSICUM 1 NO. (DICED)
TOMATO 2 NOS. (DICED)
BASMATI RICE 500 GRAMS
GHEE 1 TSP + 1 TSP
BAY LEAF 2 NOS.
GREEN CARDAMOM 4 NOS.
STAR ANISE 1 NO
CLOVES 3-4 NOS.
CINNAMON 1 INCH
BLACK PEPPERCORNS 4-5 NOS.
CARAWAY SEEDS 1 TSP
GREEN CHILLI 1 NO. (SLIT)
LEMON JUICE 1 TSP (ADD THE SLICED)
OIL 2-3 TBSP
ONION 4-5 MEDIUM SIZED. (SLICED)
GINGER GARLIC GREEN CHILLI PASTE 2 TBSP
TURMERIC POWDER ¼ TSP
DEGI RED CHILLI POWDER 1 TBSP
HOT WATER AS REQUIRED
TOMATO 1 NO. (GRATED)
CURD 200 GRAMS
BIRIYANI MASALA 2 TBSP
SALT TO TASTE
FRESH CORIANDER A HANDFUL (CHOPPED)
MINT A HANDFUL (CHOPPED)
SALT AS REQUIRED (WATER SHOULD TASTE LIKE SEAWATER)
SAFFRON & WATER MIXTURE 2-3 TBSP
GHEE 2-3 TBSP
Method:
To make the marinade add oil, all powdered spices, ginger garlic chilli paste, hung curd, lemon juice & salt into a large bowl & mix it
Further add the cubed paneer pieces & coat it with the marinade, to give this a smokey flavour place a bowl with live charcoal in the centre, pour ghee on the charcoal & cover the marinade & let it smoke for 3-4 mins then discard charcoal carefully.
At this stage you can wash basmati rice in a large bowl until the added water turns clear & let them soak for 45mins to an hour until you do the further processes.
To cook the paneer set a nonstick pan over high flame & let it get hot, then add ghee & let the ghee heat up as well.
Place the paneer pieces into pan & cook over medium flame until that side turns light golden brown, then flip all pieces & cook them on the other side, transfer all paneer tikkas in a bowl & cook the remaining pieces similarly.
Now add the veggies in the leftover marinade, mix well & cook in same pan over high flame for a few seconds, the veggies should remain crunchy, once cooked transfer the veggies into a bowl, reserve the leftover marinade.
To boil rice later, set a large stock pot over high flame & add all whole spices, green chilli & lemon juice, add the lemon slice as well, cover & let the water come to a boil.
Set a heavy bottomed vessel over high flame, let it get hot & then add oil, let the oil heat up a well.
Add onions, stir well & cook over medium to high flame until onions turn golden brown, add ginger garlic green chilli paste along with, turmeric powder, degi red chilli powder, stir & immediately add hot water & cook for 1-2 mins
Further grate & add tomato, cook over high flame for 2-3 mins
Lower flame, then add the curd in a separate bowl, add the leftover marinade, biryani masala & salt, whisk well & add it into the gravy, stir well & cook over high flame until the oil gets separated.
Once cooked, add hot water & adjust consistency, its consistency should be semi thin.
Place the cooked paneer pieces evenly over the gravy & then place the veggies as well, then add fresh coriander & mint, the base gravy is ready.
Now discard all whole spices from boiling water using a sieve, discard water from soaked basmati & add into the boiling water.
Boil rice until it gets 80-85% cooked, this will take 4-5 mins
Once cooked strain half of the rice using a large spider & spread it evenly on the paneer gravy, then add fresh coriander, mint & birista.
Then strain & add the remaining rice, add saffron & water mixture, ghee, fresh coriander, mint & birista.
Keep the wet muslin cloth over the rim of the handi & place a lid over it, then place a tawa underneath the handi & place heavy object on the lid.
Switch on flame to high & let the tawa & handi get hot for 10 minutes then lower the flame & dum cook the biryani for 10-15 mins
Switch off the flame & let the biryani rest for at least 30 mins
Once rested you can open the lid & serve the biryani.
The Music I use in All my videos – https://bit.ly/3CdPbSc
(Best for independent creators)
Follow us on all platforms:
Facebook – https://bit.ly/3o6alLt
Instagram – https://bit.ly/2RFkL8z
Follow my personal handles here: (Chef Sanjyot Keer)
Facebook – https://bit.ly/3tpjqQA
Instagram – https://bit.ly/3o0FZK8
Twitter – https://bit.ly/33qQpJN
Intro 0:00
Paneer Tikka 1:33
Rice Soaking 4:16
Cooking 4:50
Boiling water for rice 7:01
Biryani masala 7:46
Layering & dum 11:54
Plating 16:04
Outro 17:30