Category: Uncategorized

  • Eggless Burger Buns Recipe | बिना अंडे के बर्गर बंस | Chef Sanjyot Keer

    Eggless Burger Buns Recipe | बिना अंडे के बर्गर बंस | Chef Sanjyot Keer

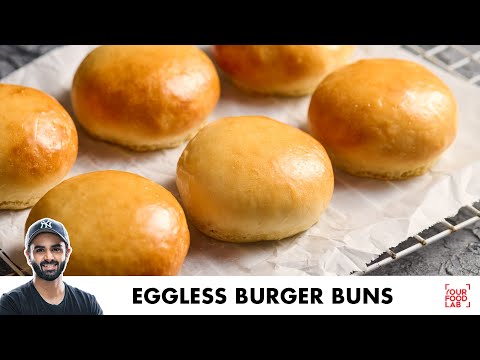
    Full written recipe Eggless Burger Buns

    Prep time: 5-10 minutes
    Cooking time: 2.5 hours
    Serves: 7 burger buns

    Ingredients:
    WATER | पानी 150 ML (LUKEWARM)
    SUGAR | शक्कर 1/2 TSP
    INSTANT YEAST | इंस्टेंट यीस्ट 6 GRAMS / 1/2 TBSP
    POTATO | आलू 1 NO. MEDIUM SIZE / 80-85 GRAMS (BOILED)
    REFINED FLOUR | मैदा 320 GRAMS
    SALT | नमक 1 TSP
    UNSALTED BUTTER | अनसाल्टेड बटर 25 GRAMS (SOFT)
    OIL | तेल AS REQUIRED
    MILK | दूध AS REQUIRED
    BUTTER | मक्खन AS REQUIRED
    Method:
    In a bowl add water & sugar, stir well to dissolve the sugar then add in the yeast & dissolve it as well, further cover the bowl with cling wrap of a plate & set it aside for 5-10 minutes.
    The mixture should froth up after the rest, this will indicate that the yeast is alive, if the mixture doesn’t froth up repeat the process with new yeast.
    Further take a boiled medium sized potato into a large bowl & mash it completely using a spatula until it becomes smooth.
    Add the refined flour & salt in the same bowl as the potato & mix the flour well with the potato.
    Further add the yeast & water mixture into the flour & combine it well using your hands to form the dough.
    Once all the dry flour gets incorporated, transfer the dough onto a flat surface & knead it for 3-4 minutes.
    Then add the soft unsalted butter in 2 batches & incorporate it into the dough, once you have added all the butter knead the dough really well for 10-12 minutes until it becomes super soft & smooth, to check if your dough is ready take a small portion of the dough & stretch it, it should form an extremely thin sheet which is almost transparent, this is called a gluten window.
    Once a gluten window forms your dough is ready, form it into a large doughball & transfer it into a large, greased bowl & drizzle a few drops of oil over the surface of the dough, cover the bowl with cling wrap & place it in a warm corner of the kitchen & let the dough ferment until its double the size, it will take 1-1.5 hours approximately depending upon the room temperature.
    After the dough becomes double in size, remove the cling & puncture the dough using your hand & then transfer it onto a flat surface & divide it into 80 grams portions, you should get about 7 portions.
    Cover the portions using a damp cloth until you roll the other doughballs, to shape the doughball pull & bring the edges of the dough portion towards the centre then flip it & roll it into a tight & smooth doughball.
    Shape all the doughballs similarly & place them on a butter paper lined baking tray & gently press all the doughballs with your hand to flatten them out.
    Further cover it with a damp cloth & let it rest for 30 minutes.
    After 30 minutes you’ll see that the doughballs have risen slightly, at this stage brush the surface of the doughballs using milk & place it into a 190C preheated oven & bake for 12-14 minutes or until their surface becomes light golden brown.
    Once the buns are baked remove the tray from the oven & brush them with melted butter immediately.
    Further transfer them from the tray onto a cooling rack & cool them down completely.
    Your freshly baked eggless & fluffy burger buns are ready.

    #YFL #SanjyotKeer #burgerbunrecipe

    The Music I use in All my videos – https://bit.ly/3CdPbSc
    (Best for independent creators)

    Follow us on all platforms:
    Facebook – https://bit.ly/3o6alLt
    Instagram – https://bit.ly/2RFkL8z

    Follow my personal handles here: (Chef Sanjyot Keer)
    Facebook – https://bit.ly/3tpjqQA​​​​​​​​​
    Instagram – https://bit.ly/3o0FZK8
    Twitter – https://bit.ly/33qQpJN

    Intro 0:00
    Yeast preparation 1:26
    Dough 5:07
    Shaping 8:54
    Baking 10:21
    Texture 13:59
    Outro 14:23

  • Sabudana Khichdi Recipe | साबूदाना खिचड़ी बनाने का आसान तरीका | Chef Sanjyot Keer

    Sabudana Khichdi Recipe | साबूदाना खिचड़ी बनाने का आसान तरीका | Chef Sanjyot Keer

    Full written recipe for Sabudana Khichdi

    Prep time: 10 minutes (excluding soaking time)
    Cooking time: 10-15 minutes
    Serves: 3-4 people

    Ingredients:
    SABUDANA | साबूदाना 1.5 CUPS
    WATER | पानी 1.5 CUPS
    PEANUTS | मूंगफली 1/2 CUP
    GHEE | घी 2 TBSP
    CUMIN SEEDS | जीरा 2 TSP
    GREEN CHILLI | हरी मिर्च 2-3 (CHOPPED)
    CURRY LEAVES | कड़ी पत्ते 10-12 NOS.
    POTATO | आलू 2 NOS. (BOILED & DICED)
    SALT | नमक TO TASTE
    SUGAR | शक्कर 1/2 TSP
    LEMON JUICE | निंबू का रस OF 0.5-1 LEMON
    FRESH CORIANDER | हरा धनिया A HANDFUL (CHOPPED)
    Method:
    Add the sabudana in a sieve & wash them using water, then transfer the washed sabudana in a large bowl & add equal amount of water, cover & let them soak for 4-5 hours until all the water has been soaked up.
    Add the peanuts into a mortar or a chopper & grind it coarsely, you don’t have to make a powder.
    Set a kadhai over high flame & once it gets hot, add ghee & once the ghee gets hot, add cumin seeds, green chilli, curry leaves & potatoes, stir & cook for 1-2 minutes.
    Further add the crushed peanuts along with soaked sabudana, salt, sugar & lemon juice, stir well & then lower the flame, cover the kadhai with a lid & let it cook for 3-4 minutes, or until the sabudana turns translucent.
    Lastly, sprinkle some fresh coriander & stir.
    Your sabudana khichdi is ready.

    #YFL #SanjyotKeer #sabudanakhichdi

    The Music I use in All my videos – https://bit.ly/3CdPbSc
    (Best for independent creators)

    Follow us on all platforms:
    Facebook – https://bit.ly/3o6alLt
    Instagram – https://bit.ly/2RFkL8z

    Follow my personal handles here: (Chef Sanjyot Keer)
    Facebook – https://bit.ly/3tpjqQA​​​​​​​​​
    Instagram – https://bit.ly/3o0FZK8
    Twitter – https://bit.ly/33qQpJN

    Intro 0:00
    Sabudana soaking 1:14
    Peanuts crushing 3:14
    Final cooking 4:07
    Plating 6:05
    Outro 6:47

  • Gobi Manchurian | Restaurant Style | गोबी मंचूरियन बनाने का आसान तरीका | Chef Sanjyot Keer

    Gobi Manchurian | Restaurant Style | गोबी मंचूरियन बनाने का आसान तरीका | Chef Sanjyot Keer

    Full written recipe for Gobi Manchurian

    Prep time: 15 minutes
    Cooking time: 20-25 minutes
    Serves: 3-4 people

    Ingredients:
    Crispy Cauliflower
    CAULIFLOWER | फूलगोभी 1 NO.
    WATER | पानी AS REQUIRED (FOR RINSING)
    SALT | नमक A LARGE PINCH
    REFINED FLOUR | मैदा ½ CUP
    CORN FLOUR | कॉर्न फ्लोर ½ CUP
    SALT | नमक TO TASTE
    BLACK PEPPER POWDER | काली मिर्च पाउडर A PINCH
    KASHMIRI RED CHILLI POWDER | कश्मीरी लाल मिर्च 1-2 TSP
    WATER | पानी AS REQUIRED (ADDED GRADUALLY)

    Method:
    Cut the cauliflower into bite sized florets then transfer them into a large bowl & rinse them well with water & a large pinch of salt, let the florets rest in salt water for 3-4 minutes, this will help to get rid of any impurities.
    Once rested, discard the salt water & rinse them with fresh water & discard the water again.
    To make the batter for frying, add equal amounts of refined flour & corn flour in a bowl & season it with salt, black pepper powder & kashmiri red chilli powder, then gradually add water while whisking continuously to make a semi thin batter.
    Further add the florets into the batter & mix well to coat them with the batter evenly.
    Fry the coated florets in moderately hot oil (170 C) until light golden brown over medium flame then transfer them into a sieve & let them rest for a few minutes, meanwhile heat the oil slightly more.
    Once rested, add the cauliflower back into the hot oil & fry them until they turn golden brown & crispy.
    Your crispy cauliflower for gobi manchurian is ready.

    Sauce
    OIL | तेल 2 TBSP
    ONION | प्याज़ 1/2 NO. (CHOPPED)
    GINGER | अदरक 1 TBSP (CHOPPED)
    GARLIC | लेहसुन 2 TBSP (CHOPPED)
    GREEN CHILLI | हरी मिर्च 1-2 NOS. (CHOPPED)
    CAPSICUM | शिमला मिर्च 1/2 NO. (CHOPPED)
    SPRING ONION BULBS | हरे प्याज़ के बूते 2 TBSP (CHOPPED)
    CORIANDER STEM | धनिए की डंठल 1/2 TBSP (CHOPPED)
    SOY SAUCE | सोया सॉस 2 TSP
    GREEN CHILLI PASTE | हरी मिर्च की पेस्ट OF 1-3 CHILLIES
    KETCHUP | केचप 1 TBSP
    RED CHILLI SAUCE | रेड चिली सॉस 1 TBSP
    WHITE PEPPER POWDER | सफेद मिर्च का पाउडर A PINCH
    SALT | नमक TO TASTE
    WATER | पानी AS REQUIRED
    CORN FLOUR | कॉर्न फ्लोर 2 TBSP
    WATER | पानी 4 TBSP
    FRESH CORIANDER | हरा धनिया A HANDFUL (CHOPPED)
    SPRING ONION GREENS | हरे प्याज़ के पत्ते A HANDFUL (CHOPPED)
    GARAM MASALA | गरम मसाला A PINCH (OPTIONAL)
    SPRING ONION GREENS | हरे प्याज़ के पत्ते A HANDFUL (CHOPPED)
    Method:
    Set a wok over high flame & let it get hot, then add oil, onion, ginger, garlic & green chillies, stir well & cook over high flame for 1-2 minutes.
    Further add capsicum, spring onion bulbs, coriander stems, soy sauce, green chilli paste, ketchup, red chilli sauce, white pepper powder & salt, give it a stir & then add water as required to make the sauce.
    Bring the sauce to a boil, then in a separate bowl add corn flour & water, mix well to make a slurry & then add it to the sauce gradually while stirring it continuously, this will thicken the sauce.
    Further add the fried cauliflower along with fresh coriander, spring onion greens & garam masala, lower the flame & just coat the cauliflower with the sauce, you don’t have to cook much at this stage.
    Then sprinkle some spring onion greens from the top.
    Your gobi manchurian is ready.

    #YFL #SanjyotKeer #gobimanchurian

    The Music I use in All my videos – https://bit.ly/3CdPbSc
    (Best for independent creators)

    Follow us on all platforms:
    Facebook – https://bit.ly/3o6alLt
    Instagram – https://bit.ly/2RFkL8z

    Follow my personal handles here: (Chef Sanjyot Keer)
    Facebook – https://bit.ly/3tpjqQA​​​​​​​​​
    Instagram – https://bit.ly/3o0FZK8
    Twitter – https://bit.ly/33qQpJN

    Intro 0:00
    Gobi preparation 1:14
    Batter 3:13
    Frying 4:11
    Final sauce 6:43
    Plating 8:40
    Outro 9:19

  • Dum Aloo Recipe | आसान कश्मीरी दम आलू | No Onion No Garlic Recipe | Chef Sanjyot Keer

    Dum Aloo Recipe | आसान कश्मीरी दम आलू | No Onion No Garlic Recipe | Chef Sanjyot Keer

    Full written recipe for Dum Aloo

    Prep time: 10-15 minutes
    Cooking time: 35-40 minutes
    Serves: 4-5 people

    Ingredients:
    POTATO | आलू 500 GRAMS (SMALL & ROUND)
    WATER | पानी AS REQUIRED
    SALT | नमक A PINCH
    MUSTARD OIL | सरसों का तेल AS REQUIRED
    BLACK CARDAMOM | बड़ी इलायची 2 NOS.
    GREEN CARDAMOM | हरी इलायची 4 NOS.
    CINNAMON | दालचीनी 2 INCH.
    CUMIN SEEDS | जीरा 1/2 TSP
    BAY LEAF | तेज पत्ता 2 NOS.
    CLOVES | लौंग 4-5 NOS.
    KASHMIRI RED CHILLI POWDER | कश्मीरी लाल मिर्च पाउडर 3 TBSP
    HOT WATER | गरम पानी AS REQUIRED
    ASAFOETIDA | हींग 1 TSP
    FENNEL SEED POWDER | सौंफ का पाउडर 2 TBSP
    GINGER POWDER | सौंठ का पाउडर 1 TSP
    SALT | नमक TO TASTE
    HOT WATER | गरम पानी AS REQUIRED
    Method:
    Add the potatoes in a pressure cooker followed by plenty of water & a pinch of salt, pressure cook the potatoes over high flame for 1 whistle only then switch off the flame & let the cooker de-pressurize naturally.
    Further take the potatoes out from the cooker & peel them once cooled, then poke holes into the potatoes using a fork or a toothpick, this will help them to fry properly.
    To fry the potatoes set a kadhai over the flame & add ample amount of mustard oil in it, the oil should be enough to partially cover the potatoes when you add them.
    Switch on the flame to high & heat the oil until it reaches its smoking point then lower the flame & allow the oil to cool down slightly.
    Further add the potatoes & fry them without stirring initially so that they start turning slightly golden from the bottom, then stir & fry them over medium high flame until they turn golden & crispy from all sides.
    Once fried, transfer the potatoes into a sieve & let them cool down, poke the potatoes again using a toothpick or a fork, this will help the spices & gravy to seep into the potatoes so that they become flavorful from the inside, your fried potatoes for dum aloo are ready.
    In a mortar add the black cardamom, green cardamom & cinnamon stick & pound them very slightly so that the cardamom pods break open & the cinnamon stick breaks.
    Further take some oil out from the kadhai to make the gravy & heat the oil in the kadhai.
    Add the cumin seeds, bay leaf, cloves & the crushed spices, mix the kashmiri red chilli powder & hot water in a separate bowl & add the paste, stir well & cook the spices & the kashmiri red chilli powder for 1-2 minutes over low flame.
    Further add asafoetida, fennel seed powder & ginger powder, stir well & cook for 3 minutes over medium flame.
    Then add the fried potatoes along with salt to taste & stir well, make sure you turn the flame to medium high at this stage & cook the potatoes for 3-4 minutes.
    Add hot water only till the surface of the potatoes & bring it to a boil.
    Once the gravy comes to a boil, cover the kadhai with a lid & place some weight on the lid, you can also use foil paper to cover the kadhai for dum cooking.
    Cook the dum aloo over low flame for 20-25 minutes.
    Once cooked take off the lid, you’ll see that the gravy has reduced, authentic dum aloo’s gravy is thick but you can adjust the consistency as per your preference, taste & adjust seasoning accordingly.
    Your authentic, delicious & easy dum aloo is ready, serve it hot with rice.

    #YFL #SanjyotKeer #dumaloo

    The Music I use in All my videos – https://bit.ly/3CdPbSc
    (Best for independent creators)

    Follow us on all platforms:
    Facebook – https://bit.ly/3o6alLt
    Instagram – https://bit.ly/2RFkL8z

    Follow my personal handles here: (Chef Sanjyot Keer)
    Facebook – https://bit.ly/3tpjqQA​​​​​​​​​
    Instagram – https://bit.ly/3o0FZK8
    Twitter – https://bit.ly/33qQpJN

    Intro 0:00
    Aloo process 0:54
    Khade masale & cooking 5:03
    Plating 9:21
    Outro 9:54

  • Veg Railway Cutlet Recipe | स्वादिष्ट रेलवे कटलेट | Chef Sanjyot Keer

    Veg Railway Cutlet Recipe | स्वादिष्ट रेलवे कटलेट | Chef Sanjyot Keer

    Full written recipe for Railway Cutlet

    Prep time: 15-20 minutes
    Cooking time: 20 minutes
    Serves: 18 pieces.

    Ingredients:
    Cutlet mixture
    OIL | तेल 2 TBSP
    CUMIN SEEDS | जीरा 1/2 TSP
    GINGER | अदरक 1 TSP (CHOPPED)
    GREEN CHILLI | हरी मिर्च 2-3 NOS. (CHOPPED)
    ASAFOETIDA | हींग A PINCH
    CARROT | गाजर 1 NO. (CHOPPED)
    BEETROOT | चुकुंदर 1 MEDIUM SIZED (CHOPPED)
    FRENCH BEANS | फंसी 1/3 CUP
    GREEN PEAS | हरा मटर 1/3 CUP
    POWDERED SPICES
    TURMERIC POWDER | हल्दी पाउडर 1/4 TSP
    CORIANDER POWDER | धनिया पाउडर 2 TSP
    SPICY RED CHILLI POWDER | तीखी लाल मिर्च 1 TSP
    GARAM MASALA | गरम मसाला 1/4 TSP
    BLACK PEPPER POWDER | काली मिर्च पाउडर A PINCH
    SALT | नमक A PINCH
    POTATO | आलू 4-5 MEDIUM SIZED (BOILED)
    CORN FLOUR | कॉर्न फ्लोर 1 TBSP
    BREADCRUMBS | ब्रेड क्रंब्स 3 TBSP
    SALT | नमक TO TASTE
    DRY MANGO POWDER | आमचूर पाउडर 2 TSP (OR LEMON JUICE)
    FRESH CORIANDER | हरा धनिया A HANDFUL (CHOPPED)
    Crumbing
    REFINED FLOUR | मैदा 4 TBSP
    CORN FLOUR | कॉर्न फ्लोर 2 TBSP
    SALT | नमक A PINCH
    WATER | पानी AS REQUIRED
    BREADCRUMBS | ब्रेड क्रंब्स AS REQUIRED
    SALT | नमक A PINCH
    Method:
    Set a pan over high heat & once it gets hot add in the oil, cumin seeds, ginger, green chilli & asafoetida, stir & cook briefly over high flame.
    Further add carrot, beetroot, french beans & green peas, stir well & cook over high flame for 2-3 minutes.
    Then add all the powdered spices, salt, mix well & continue to cook over high flame for 1-2 minutes.
    Once cooked, transfer the veggies into a large mixing bowl & let them cool down completely.
    While the veggies are cooling down, take a large plate or tray & mash the potatoes in them using a potato masher.
    Once the veggies have cooled down, add corn flour, breadcrumbs, mashed potatoes, salt, dry mango powder & fresh coriander, mix all the ingredients well using your hands, you don’t have to mash or knead the mixture.
    If you feel like there is not enough binding then you can add more breadcrumbs as required, to check if the mixture is ready take a small portion of the mixture & press it, if it binds & holds its shape perfectly then your mixture is ready to be shaped.
    To shape the railway cutlets, take a medium sized portion of the mixture & form it into a roundel, once you have the roundel form it into a droplet shape using your palms & then press it in a single stroke to form the cutlet, shape all the cutlets similarly.
    Make the slurry for crumbing by adding refined flour, corn flour, salt & water as required while whisking continuously to form a semi-thin slurry.
    Add breadcrumbs as required in a tray or a plate & season them with salt.
    Add the shaped cutlet into the slurry & coat it well with the slurry, then take it out from the bowl using a fork & let the excess slurry drip off.
    Place the cutlet in the breadcrumbs & cover it well with the breadcrumbs, make sure that an even layer of the breadcrumbs is applied, coat all the cutlets similarly.
    To fry the cutlets heat oil until it gets moderately hot (165 C), then drop the cutlets in the oil carefully & fry over medium high flame until golden brown & crispy.
    Once fried transfer them into a sieve so that all the excess oil drips off.
    Your railway cutlets are ready, serve them hot with bread slices, butter & ketchup.

    #YFL #SanjyotKeer #cutlet

    The Music I use in All my videos – https://bit.ly/3CdPbSc
    (Best for independent creators)

    Follow us on all platforms:
    Facebook – https://bit.ly/3o6alLt
    Instagram – https://bit.ly/2RFkL8z

    Follow my personal handles here: (Chef Sanjyot Keer)
    Facebook – https://bit.ly/3tpjqQA​​​​​​​​​
    Instagram – https://bit.ly/3o0FZK8
    Twitter – https://bit.ly/33qQpJN

    Chapters
    Intro 0:00
    Cutlet Mixture 0:45
    Crumbing 4:39
    Frying 7:00
    Plating 7:51
    Outro 8:48

  • Chicken Kali Mirch Tikka without Oven | बिना ओवन के तंदूर जैसा कालीमिर्च टिक्का | Chef Sanjyot Keer

    Chicken Kali Mirch Tikka without Oven | बिना ओवन के तंदूर जैसा कालीमिर्च टिक्का | Chef Sanjyot Keer

    Full written recipe for Kali mirch Tikka

    Prep time: 15-20 mins
    Cooking time: 15-20 mins (excluding marination time)
    Serves: 3-4 people

    Ingredients:
    First marination
    CHICKEN | चिकन 500 GRAMS (BREAST)
    SALT | नमक TO TASTE
    LEMON JUICE | निंबू का रस 2 TSP
    GINGER GARLIC PASTE | अदरक लेहसुन की पेस्ट 2 TBSP
    Second marination
    CASHEW | काजू 18-20 NOS. (SOAKED IN HOT WATER)
    FRESH CREAM | फ्रेश क्रीम 4 TBSP
    GREEN CHILLI | हरी मिर्च 1 NO.
    CORIANDER POWDER | धनिया पाउडर 1 TSP
    CUMIN POWDER | जीरा पाउडर 1/2 TSP
    GARAM MASALA | गरम मसाला A PINCH
    BLACK SALT | काला नमक A PINCH
    ROASTED KASURI METHI POWDER | भुनी हुई कसूरी मेथी का पाउडर A PINCH
    CARDAMOM POWDER | इलाइची पाउडर A PINCH
    HUNG CURD | टंगा हुआ दही 3/4 CUP
    BLACK PEPPERCORNS | साबुत काली मिर्च 1.5 TBSP (COARSELY CRUSHED)
    CORN FLOUR | कॉर्न फ्लोर 1 TSP
    LIVE CHARCOAL | जलता हुआ कोयला
    GHEE| घी
    Cooking on pan
    GHEE | घी 1 TBSP
    BUTTER | मक्खन (MELTED) AS REQUIRED
    Cooking in oven
    BUTTER | मक्खन AS REQUIRED (MELTED)
    Method:
    To marinate the chicken, cut it into thin slices & add it into a bowl.
    Further add salt, lemon juice & ginger garlic paste, mix well & apply the marinate over the chicken, let the chicken marinate for half an hour.
    To make the second marinade, add the soaked cashews into a mixer grinder jar along with fresh cream, green chilli, coriander powder, cumin powder, garam masala, black salt roasted kasuri methi powder & cardamom powder & grind it into a fine paste.
    Add the hung curd in a plate followed by the cashew paste, coarsely crushed black peppercorns & corn flour, then mix everything well until a smooth marinade is formed.
    Further add the first marinated chicken into the second marinade & apply it well on the chicken.
    You can smoke the chicken at this stage by placing a bowl with live charcoal, pouring ghee on it & covering it for a few minutes.
    To cook the chicken on a pan, skewer the chicken on bamboo skewers.
    Set a pan over high heat & once it gets hot, add ghee & once the ghee gets hot, place the skewers.
    Cook the chicken over medium high heat for 3-4 minutes & then flip & cook it from the other side similarly.
    Once cooked, take the skewers off of the pan & to give it a charred effect like a tandoor, apply some melted butter over the chicken & hold it over open flame until the charred marks appear, this step is optional.
    Your kali mirch tikkas cooked on a pan are ready.
    To cook them in an oven, heat the oven to 200 C then place the chicken skewers on a baking pan, make sure you use metal skewers for the oven.
    Place the chicken in the oven & let it bake for 15 minutes, remove the chicken from the oven when there are 2-3 minutes left & apply melted butter on the chicken & place it back in the oven.
    Once cooked remove the chicken from the oven.
    Your delicious kali mirch tikkas are ready, serve them hot, add lemon juice & chaat masala on the tikkas along with chutney.

    Recipe for green chutney https://youtu.be/pC5sZ8-mFr4

    #yfl #SanjyotKeer #chickentikka

    The Music I use in All my videos – https://bit.ly/3CdPbSc
    (Best for independent creators)

    Follow us on all platforms:
    Facebook – https://bit.ly/3o6alLt
    Instagram – https://bit.ly/2RFkL8z

    Follow my personal handles here: (Chef Sanjyot Keer)
    Facebook – https://bit.ly/3tpjqQA​​​​​​​​​
    Instagram – https://bit.ly/3o0FZK8
    Twitter – https://bit.ly/33qQpJN

    Chapters
    Intro 0:00
    Cutting Chicken 1:04
    First Marination 2:35
    Second Marination 3:04
    Cooking on pan 6:50
    Cooking in oven 9:35
    Plating 10:51
    Outro 11:29

  • Chocolate Granola Bar Recipe | No Oven Healthy Recipe | चॉकलेट ग्रनोला बार्स | Chef Sanjyot Keer

    Chocolate Granola Bar Recipe | No Oven Healthy Recipe | चॉकलेट ग्रनोला बार्स | Chef Sanjyot Keer

    Saffola Honey Active is made with multiflora Honey including delicious Sundarban Forest Honey, it is naturally aromatic, sweet and fruity. Start your day with delightful spoon of Saffola Honey.

    #yfl #SanjyotKeer #granolabars #SaffolaHoneyActive #100% pure #withSundarbanForestHoney

    Amazon link

    Full written recipe for Granola Bars

    Prep time: 10-15 minutes
    Cooking time: 25-30 minutes (excluding setting time)
    Serves: 20 bars
    Ingredients:
    ROLLED OATS | रोल्ड ओट्स 2 CUPS
    ALMOND | बादाम 1/2 CUP (CHOPPED)
    CASHEW | काजू 1/2 CUP (CHOPPED)
    WALNUT | अखरोट 1/4 CUP (CHOPPED)
    PUMPKIN SEEDS | कद्दू के बीज 1/2 CUP
    SUNFLOWER SEEDS | सनफ्लावर के बीज 1/2 CUP
    FLAX SEEDS | अलसी के बीज 2 TBSP
    DATES | खजूर 20 NOS. (PITTED)
    DRIED CRANBERRY | ड्राइड क्रैनबेरी 1/4 CUP
    DRIED BLUEBERRY | ड्राइड ब्लूबेरी 1/4 CUP
    HONEY | शहद 1/2 CUP
    DARK CHOCOLATE | डार्क चॉकलेट 250 GRAMS (CHOPPED)
    COCONUT OIL | नारियल तेल 1 TBSP
    Method:
    Set a pan over medium high heat & add the rolled oats in it once the pan gets hot, toast the oats while stirring continuously until they get slightly golden then transfer them into a large mixing bowl.
    Set the pan back on the heat & then add the chopped almonds, cashews & walnuts, toast them while stirring until they get golden & then transfer them into the same bowl with the oats.
    Further set the pan back on heat & add all the seeds & toast them similarly, transfer the toasted seeds into the same mixing bowl as the oats & nuts.
    Let all the toasted ingredients cool down completely, meanwhile add the pitted dates into a mixer grinder jar & grind them into a finer paste, make sure you use soft dates as they are easier to grind.
    Once the oats mixture cools down add in the dried berries along with the honey & mix really wel.
    Further add the date paste & combine everything suing a spatula or your hands.
    Once combined transfer the mixture into a butter paper lined baking tray & level it out using a spatula.
    Then use a potato masher to press everything evenly, this step is very important, if you don’t press the mixture well then the bars will break while cutting them into pieces.
    To level it out further, cover the surface with a plastic sheet or a clingwrap & move the rolling pin over it.
    Place the tray inside the fridge for the bars to set while you melt the chocolate.
    Place a heatproof bowl over a stockpot with boiling water, add the chopped dark chocolate & coconut oil, stir until the chocolate melts.
    Once the chocolate melts remove it from the heat, get the tray from the fridge & pour the melted chocolate over the granola, spread it out evenly using a spatula.
    Place it back in the fridge & let it set for 4-5 hours or overnight.
    Once set demold it, remove the butter paper & cut it into bars according to your preference.
    Your delicious, healthy & homemade granola bars are ready.

    The Music I use in All my videos – https://bit.ly/3CdPbSc
    (Best for independent creators)

    Follow us on all platforms:
    Facebook – https://bit.ly/3o6alLt
    Instagram – https://bit.ly/2RFkL8z

    Follow my personal handles here: (Chef Sanjyot Keer)
    Facebook – https://bit.ly/3tpjqQA​​​​​​​​​
    Instagram – https://bit.ly/3o0FZK8
    Twitter – https://bit.ly/33qQpJN

    Chapters
    Intro 0:00
    Granola base 1:09
    Chocolate layer 6:13
    Plating 7:46
    Outro 8:00